About six months ago my new wife and I upped sticks from the heart of South East London, to a small market town in Hertfordshire called Berkhamsted. Having moved into a new house, I took the opportunity to re-evaluate my cheese making set up. It’s taken a couple of months, but I reckon I’ve now got the best home cheese-making setup possible.
Having been making cheese at home for 5 years now, and having had various home cheese-making setups, I have quite a clear idea of how I like my kit laid out, how I like the space to work, and an even clearer sense of what mistakes to avoid.
- No highly-customised small-scale cheese making equipment. There are two reasons for this, both of which are well illustrated by my old vat. It was designed as a “experimental vat” for industrial scale cheese makers, which could take around 20 litres of milk. It worked perfectly well, up until the day I knocked the drainage tap while cleaning it, and found the seal was no longer water tight. After finding out about food-safe solder, I managed to bodge a fix, however it never sat right with me. Also, when people asked me about how I made cheese at home, replying with “oh, I have a customised cheese vat” automatically turns them off the idea that they can do it themselves (something I’m passionate about). The perfect home cheese making setup should consist of off-the-shelf products, which can easily be repaired and replaced.
- Everything needs to be super easy to clean. In the early days of my home cheese making, my biggest enemy was contaminants. I was recently asked by someone looking to start making cheese themselves whether they should be worried about dodgy moulds making them sick. My response was that in the first year of home cheese making, I made myself sick twice, but both times were entirely my own fault. Poor attention to cleanliness is the enemy of cheese making. I always liken cheese making to those early school experiments where you grow cultures in a petri dish. That agar jelly, and your “blank” cheese is a perfect place for moulds to grow, good or bad. So minimising the “bad” is of paramount importance.
- The whole setup needs to be relatively compact. This is partly for ease of access, and also because I’m not about to turn my entire house over to cheese making (well, that’s the line I’m going with anyway!), so it needs to fit neatly into a small space.
So having unpacked all the rest of the house, and done all the boring but fun stuff like painting, I then turned my attentions to my cheese corner (my wife won’t let me call it the cheese room!). I spent ages poring over the Nisbets catalogue (highly recommended!), weighing up various options, and thinking back to what frustrated me about my previous setup, and I ended up with what I think, is the perfect home cheese making setup.

The complete home cheese making set
Any room will do for a cheese room, although ideally you’d want it to be uncarpeted and easy to clean. My cheese corner occupies an area of around two metres in length, and one metre in depth.
Storage & Sanitation
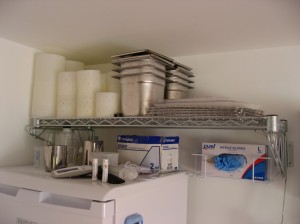
Wire shelf
Starting at the top, I needed somewhere to put moulds, racks and bits and bobs. A normal shelf isn’t really good enough, as it needs to be easy to clean, and be food safe.

Sterile gloves
In my old cheese making setup, after washing my hands I used hand sanitiser before handling the cheese, however it always worried me that the residue would taint the taste. Powder-free gloves, although not exactly natural, are the best way of reducing contaminants. Obviously wash your hands first!
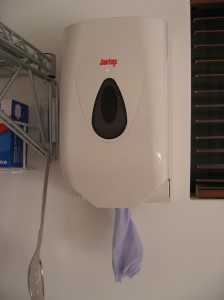
Towel dispenser
Staying in the exciting world of hygiene, next up is a centrefeed dispenser. This might sound dramatic, but having easy access towels has literally revolutionised my home cheese making. Cleaning up simple spills, and even patting down overly wet curd is now a complete breeze. I didn’t quite read the description when buying the rolls themselves, so was a bit surprised when a box of twelve turned up, but with the amount I use them that’s a good thing!
Milk Transportation
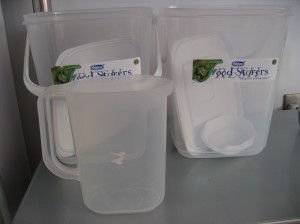
Milk containers
Now hygiene is out of the way, let’s move on to the bits needed to actually make the cheese. First of all, getting the milk from the vat (or cow, if you’re lucky enough to have access to some). Food-safe containers. Not very exciting, but worth getting a few good ones, in a variety of sizes up to around 10 litres, otherwise it’ll get too heavy to carry. I got these ones in Dunelm, but similar ones are available from any supermarket or DIY shop.
Measurement Tools
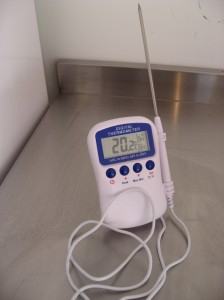
Thermometer
Once the milk is in the vat, having an accurate temperature measurement is extremely important. Just a few degrees too high can send acidification out of control – too low a temperature and progress will be slow.
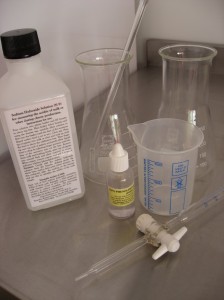
Titration kit
Speaking of acidification, having a titration kit or pH meter is vital throughout the cheese making process. Most industrial cheese making recipes use titratable acidity measurements rather than pH in their instructions, and for good reason. Titratation using sodium hydroxide and phenolphthalein measures the acidity of a solution, whereas pH measures the concentration of free hydrogen ions. There is no direct relationship between the two, and the milk acidity is what you’re trying to measure, pH changes are just a by-product, which can be otherwise impacted by the specific buffering capacity of the milk sample. Well, that’s what A-level chemistry taught me anyway!
Do I Need A Section About A Spoon & A Pallet Knife?
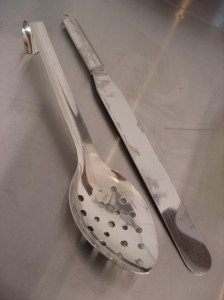
Spoon and palette knife
Well, yes actually! When I started making cheese at home, I had no idea how much a proper spoon and pallet knife would be! Stirring the milk to make sure any separated fat is thoroughly mixed through is a job for a decent perforated spoon. I can’t say for certain that perforation makes a difference, but it seems easier to stir. A palette knife can be used to cut the curd, ideally a completely stainless steel one for easy cleaning.
Moulds & Starters
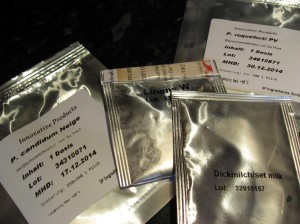
Moulds and starters
All home cheese makers need a variety of moulds in their freezer on hand to innoculate milk depending on what’s being made. I usually have the full colour spectrum available, to ensure I can make whatever takes my fancy: blue (top right), white (left) and orange (centre) covers just about everything.
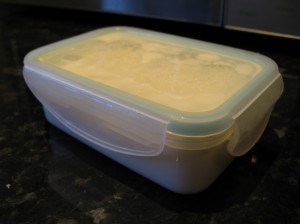
Made up starter
As well as having packet DVI starter in the freezer, I also have a variety of liquid starters frozen from previous successful batches of cheese. These can be used to innoculate future batches, and require food-safe freezable containers which hold around 150ml.
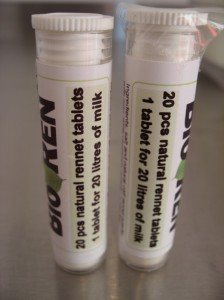
Natural rennet in tablets
Since I haven’t been making cheese much recently, I’d started using rennet tablets rather than liquid, and have found them fantastic. The strength seems much more consistent, and their expiry date is years away rather than a few months with liquid rennet.
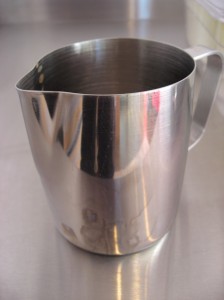
Stainless steel jug
Rennet tablets need to be dissolved in cold, filtered water, so what better to use than a stainless steel milk jug, similar to those used to froth milk in coffee shops.
Curd-handling Tools
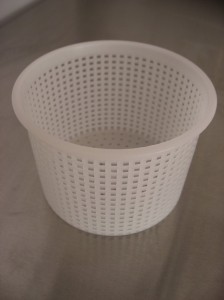
Curd scooper
Once the milk has set, and the curd has been cut, it needs to be scooped out into moulds. Having tried various types of perforated spoons in the past, I found that just using a small soft cheese mould actually works better than anything else.
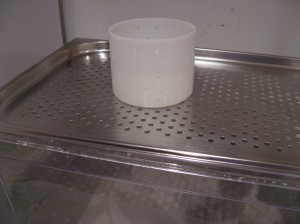
Cheese draining system
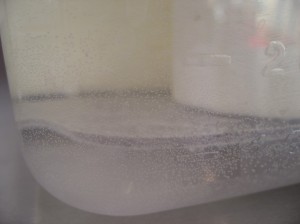
The curd, now in moulds, needs somewhere to drain. A perforated gastronorm, sitting on top of a clear gastronorm is the perfect solution. It’s sturdy enough to allow reasonable amounts of pressure should the cheese need it, and the clear gastronorm makes sure that you never end up overflowing.
Storing Young Cheeses
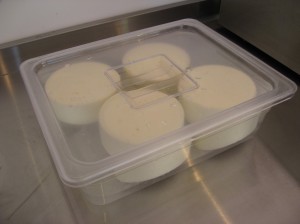
Cheese storage
Once the cheeses are drained, pressed and fully formed, they need somewhere to live. I’ve found clear gastronorms the best way to go, since they’re food safe, easy to clean and fit in the fridge easily. They’re also useful for brining, as shown above.
Gastronorm shelf
The best bit about these gastronorms, is that they have a little shelf inside meaning the cheese doesn’t sit in it’s whey, as well as giving the possibility of adding a little bit of water to the bottom which with the addition of a lid, creates a nice humid little box for cheeses to live in.
Cheese Fridges! (yes, I definitely need two…)
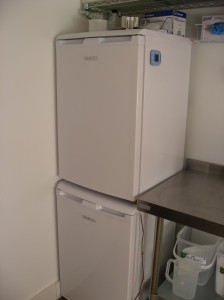
Fridges for cheese making
Now the cheeses are ready for storage, it’s time to look at the cheese cave. I’ve got two ordinary household fridges sitting on top of each other. While using one fridge is fine, having two gives you the opportunity to reduce mould cross-contamination by physically separating your cheeses.
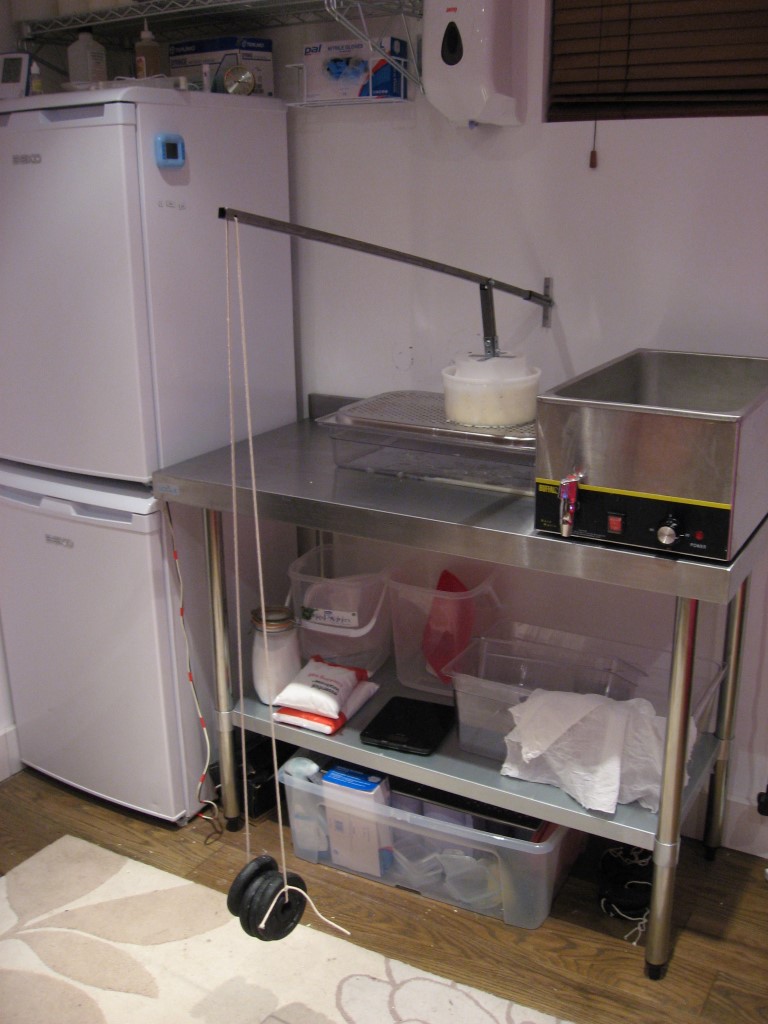
And finally… the all-important vat!
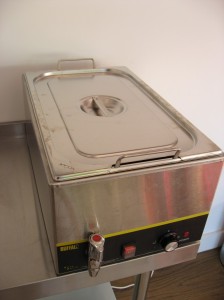
Bain marie for cheese making
Saving the best for last – the vat. A simple bain marie, with a single full-sized gastronorm immersed inside.
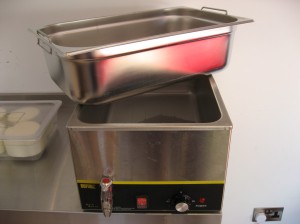
Bain marie for cheese making
With temperature control up to 90C, the bain marie heats the milk up with quite incredible speed, and accuracy. With a capacity of 20 litres, it’s the perfect size for home cheese makers.
What’s Next?
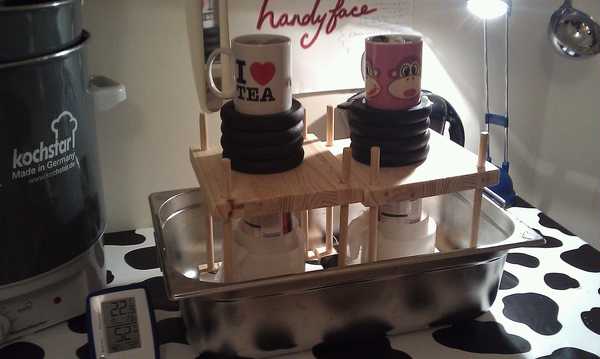
So, what’s left to do? Well, I need to sort out the temperature and humidity controller so it’s constructed from off-the-shelf components, and also gives some historical information about how those parameters have changed over time.
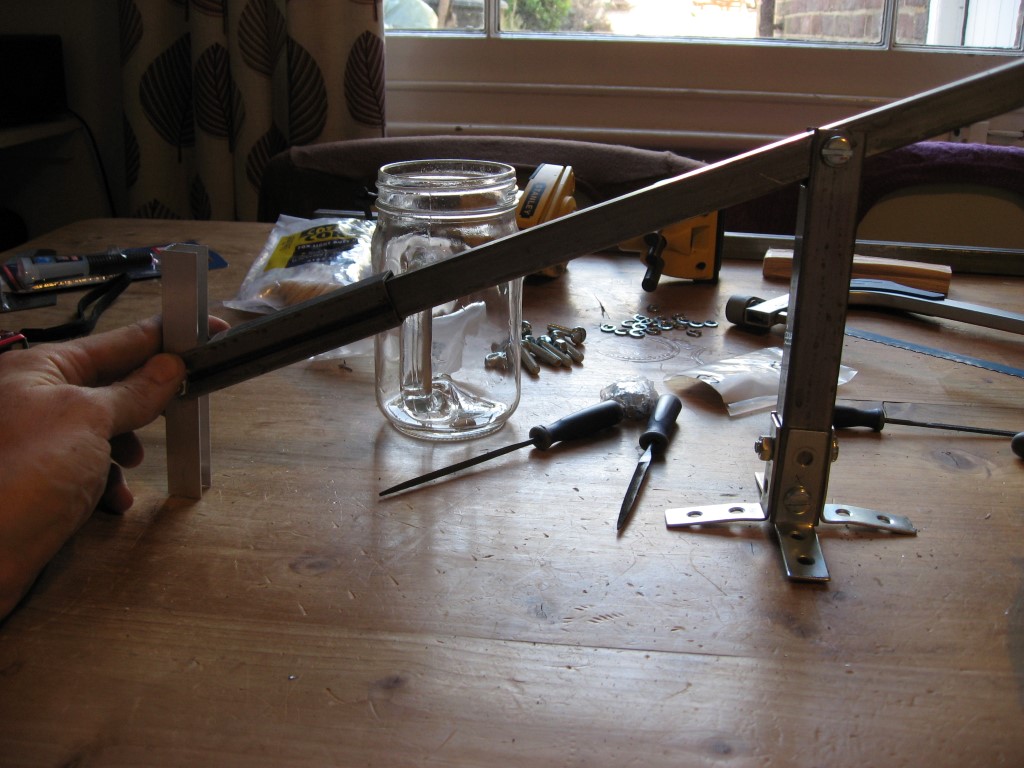
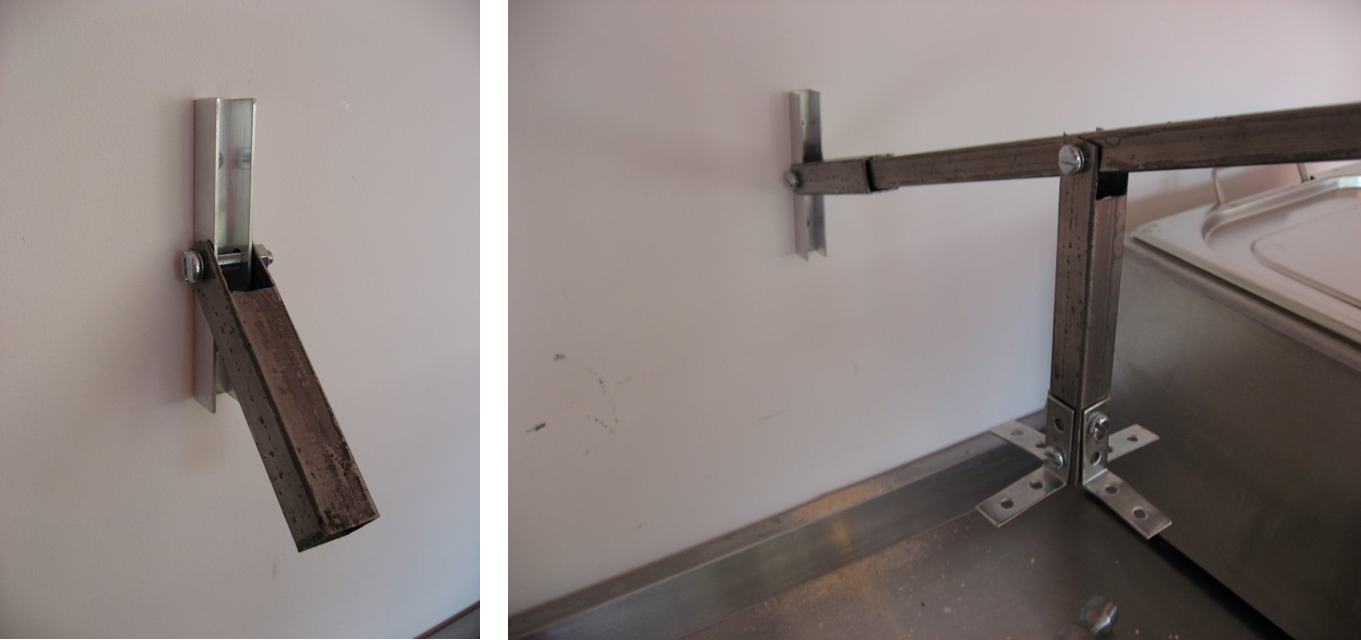
Also I need to construct a press. I’ve tried traditional Dutch presses in the past, but the cleanliness was always questionable, and the ability to apply the large pressures required for cheddars and the like just wasn’t possible on such a small piece of kit. I’ve got a few ideas, and am planning on starting construction in the next couple of weeks, so I’ll follow up with a post once it’s complete.