Tags
amateur cheese, animal rennet, ayrshire milk, cheese, cheese making, diy, diyfood, epoisse, food, local, organic, raw milk, salt, sea salt, vegetarian rennet, washed rind
Inspired by my experience washing Bermondsey Spa cheese in Kernel Brewery ale with Mootown Cheese I decided I wanted to try and recreate it’s oozing, meaty goodness at home.
At the heart of any sticky, orange-coloured cheese like Milleens or Stinking Bishop is the bacteria brevibacterium linens. This naturally occurring bacteria is present on human skin at an incredibly high concentration, and if left unchecked, can start to smell – especially on your feet!
Just as the blue of Roquefort cheese comes from naturally occurring spores in the Roquefort Caves, washed rind cheeses are also a product of their surroundings. Historically, sweaty cheesemakers unwittingly transferred their own strain of bacteria to the cheese which, with the right environment, caused a sticky, pungent orange rind to form. As the cheese matured, the bacteria ate into the cheese paste, causing it to break down into a soft, meaty cheese.
Nowadays of course, the bacterial strain has been isolated and cheese is innoculated directly during the make, or propagated from an existing cheese through washing. Even though cheese making is a sanitary process, the “smelly feet” odour remains, which sadly turns a lot of people off washed rinds. It’s unfortunate because many – such as Stinking Bishop – actually have quite a mild flavour.
I picked up my usual 24 pints of Redlays Farm unpasteurised Ayrshire milk from Blackheath market on Sunday and got cracking!
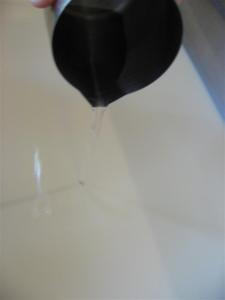
Having not had much success with making washed rinds in the past, I asked around a few cheese making friends and forums for any tips. A fair number of people recommended innoculating with geotrichum candidum to create a “clean layer” for the brevibacterium linens to grow on. So, after heating the milk to 31C, I added these, plus some DVI starter and left to acidify for 30 minutes.
Previous experiments into how much rennet to use indicated I should use around 0.06% animal rennet, diluted in four times as much water, to achieve a set in around 60 minutes.
In reality the curd took around 20 minutes longer than expected to give a clean break – I think this may be down to natural degradation in strength of the rennet, as I’ve had the same bottle on the go for quite a while now.
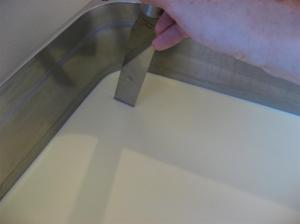
Using a palette knife, I cut the curd into roughly 1cm cubes, starting with large blocks vertically, then smaller and smaller, angling the knife to try and cut through the blocks. Cutting the curd allows whey to be released from the curd, and slows down the rennet acidification.
Once the curd has rested for a few minutes to allow it to heal (i.e. recover from the cutting), it’s time to get stirring and heating in order to slow the rennet action even further and release more whey, making a less squidgy curd. I heated to around 35C over the course of 20 minutes or so.
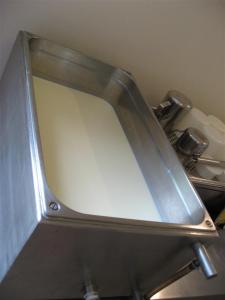
Here’s where my lovely vat becomes really useful. Having the tap at the front allows whey to be drained off much quicker and easier than ladelling out by hand. Once the whey had been completely drained off, it’s time to carefully squash the curd into the moulds and add some weights on top for around 24 hours.
Then it’s time for the salting to start! In the past, I’ve mostly used dry salting (i.e. applying salt directly to the cheese), however washed rinds are generally initially bathed in salt water to allow the salt to permeate throughout the cheese. In this case, the cheeses floated around in a 16% brine solution for 12 hours, after which they were given a bit of a drying off, then placed in a fridge at 16C at over 90% humidity.
After about a week, a light fluffy covering of geotrichum candidum had appeared, so it was time to start washing, to keep the surface moist and salty to encourage the brevibacterium linens growth.
First up for a wash was the parent propagator cheese. This is one from a previous batch of cheese I’d made which had ended up with a great flavour and texture, so I wanted the strain to continue. Washing consisted of a couple of drops of 10% salt water solution and a bit of gentle smearing.
Washing continued roughly every couple of days. As my experience with Bermondsey Spa had taught me, if the texture of the surface was any more moist than a postage stamp, I postponed washing till the following day.
After about three weeks I cracked them open and had a taste. They were really, really good! So good in fact that I actually allowed other people to have a taste, including washed rind cheese king, Bill Oglethorpe of Kappacasein, who said:
Just polished off the cheese, it’s really good! I thought there might be too much salt and a hint of bitter but on second thoughts its fine. The contrast in textures is really nice, oozing on the edges and slightly chalky in the middle. I left it at room temperature for a couple of days and it survived very well.
I’m very happy with this recipe and the feedback. Next time I might try to go a little lighter on the salt concentration to address Bill’s concerns, but other than that it seems like a winner!


Nice looking cheeses. I use to shy away from washed rind cheeses due to the smell, but after trying one, I was impressed and inspired to make one or two. Well done, I rather enjoy your post.
Thanks! They are quite smelly, but taste good!
Interesting article, but not convinced by what you say about Stinking Bishop. I’ve tried it several times (always from the only local source, and the cheese in general there is in superb condition, so I doubt it’s badly kept), and every time the taste has been as bad as the smell.
From what I’ve read I expected a similar experience to Limburger – didn’t get it though.
I would consider most washed rinds as having a mild flavour in comparison to something like a roquefort. All a matter of taste though I suppose – I’ve met quite a few people who wouldn’t go near a washed rind!
Hey, looks prettay good! Been following your blog for a while and love your work! I was a working at Sparkenhoe for a year or so there and have moved back to Northern Ireland to start up my own cheesemaking venture, crowdfunding it at the minute, you ever thought of moving into it as a business?
Check out my web if you get a minute http://www.mfcheese.com
Wow that looks great – perfect name too, Mike’s Fancy Cheese 🙂
I have definitely considered making my cheese as a business, I’ve just not got round to actually looking for premises. Definitely something for the future!
Cheese if the future!
Exciting times and plenty of opportunities.
Hopefully see you on the cheesemaking circuit in the not too distant future.
Pingback: Never Wishy-Washy about Washed Rind Cheeses – Cheesepalooza Challenge #10 | Much To Do About Cheese
I’ve decided to start making my own cheese and this recipe looks like exactly what I want however I’m wondering whether I need a more ‘beginners’ recipe for a starting point. I’ve made cream cheese, ricotta and mozzarella. Do you have any recommendations of recipes for one up from there? Also I only have general kitchen equipment so any recommendations on ‘must have’ kit to get me started would be amazing.